Description
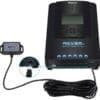
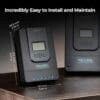
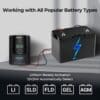
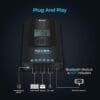
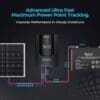
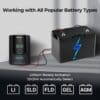
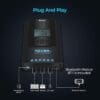
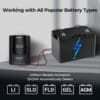
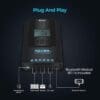
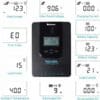
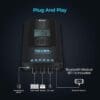
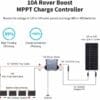
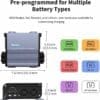
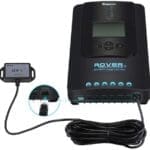
The Renogy 40A Rover MPPT Charge Controller is the most efficient type of charge controller. With up to 99% tracking efficiency, the Rover ensures maximum power point solar charging that gets more energy to your battery bank. Capable of automatically detecting 12V/24V lead acid battery systems, this crucial component is preset to also work with Gel, Flooded (wet cell), Sealed, and even Lithium batteries. When paired with the Renogy BT-1 Module and DC Home app you can view system performance in real-time and make parameter changes without having to get up!
20A/30A/40A MPPT Solar Charge Controller w/ Bluetooth Module
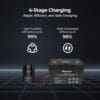
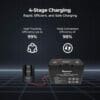
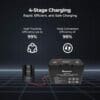
Rapid, Efficient, and Safe Charging
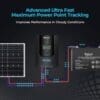
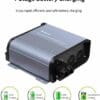
It has up to 99% tracking efficiency to allow you to charge the battery from solar panels at the maximum power point!
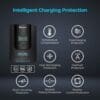
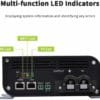
The controller also has the self-diagnostic capability and will highlight any system errors using advanced fault-targeting technology.
- Nominal System Voltage: 12/24V Auto-Detect
- Rated Charge Current: 20A
- Max. PV Input Voltage: 100 VDC
- Max. PV Input Power: 12V/260W, 24V/520W
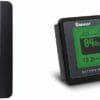
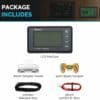
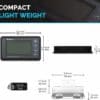
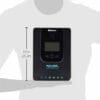
- Dimensions: 210 x 151 x 59.5 mm; 8.27 x 5.94 x 2.34 in
- Weight: 1.4kg / 3.08 lb








Kalle77 –
Hohe Solar-Ernte, schonende Ladung, verwirrende AnleitungVorbemerkungen:===============Warum Laderegler?—————–Solarzellen und Akkus passen wegen ihrer grundverschiedenen Strom/Sannungs-Kennlinien nicht direkt zusammen. Daher ist es gefährlich, einen Blei-Akku zum Aufladen direkt an Solarzellen anzuschließen. Ebenso bringt es nichts, Solarzellen direkt an Verbraucher anzuschließen, die konstante Spannung erfordern. Erst ein “Solar-Laderegler” ermöglicht es, die Akkus effizient und sachgemäß mit Solarstrom zu laden. Effizient bedeutet, daß aus der Sonnenstrahlung, ob stark oder schwach, die jeweils max. mögliche Akkuladung geerntet wird. Sachgemäß bedeutet das je nach Akkutyp ein ihm gerechter Ladeverlauf angeboten wird und er damit z.B. auch nicht überladen wird. Er sorgt dafür, dass 12 V Verbraucher unter Last auch mit vollen 12 V versorgt werden können, z.T mit Hilfe des Akkus.Warum ist ein MPPT Laderegler optimal?————————————–MPPT (Maximum Power Point Tracking) schiebt das mögliche Maximum der Solar-Ernte, unabhängig von der Höhe der einkommenden Strahlung, immer in den güünstigsten Lade-Bereich. Hat das Solar-Panel gegenüber dem Akku Spannung im Überfluß, sorgt ein Spannungs StepDown-Regler für entsrechend mehr Strom.Bedien-Strategie: (bei diesem Gerät nicht so optimal)—————–Jedes moderne Gerät hat eine Kombination aus einigen Tasten und Anzeige-Elementen und fast jeder Hersteller erfindet entsprechend den unterschiedlichen Aufgaben seiner Geräte indivuelle Bedienstrategien so auch hier. Das bedeutet für den Benutzer notgedrungen eine komplizierte Einarbeitung.- Negativ: Die englische Anleitung ist in sich zwar korrekt aber schlecht strukturiert. Die Anleitung in deutsch ist dagegen noch schwerer zu verstehen.- Leider ist das LCD nur schwarz/weiß und unbeleuchtet. Zu dem ist es unflexibel designt, da für alle Symbole feste Plätze vorgegeben sind. So fallen die meisten Symbole winzig bis unlesbar aus.+ Positiv: Fast alles wird beim Start von der Automatik perfekt erledigt. Die komplexeren Schritte zur individuellen Einstellung spezifischer Parameter kann man zunächst außen vor lassen.Wichtig beim Start der Bedienung:=================================1. Solarzelle zuerst abklemmen, und das auch vor jedem Akku-Wechsel!2. Dann Akku anklemmen, in der oberen vertikalen LED-Zeile leuchtet (Pos.2 Akku) auf, im darunter liegendem LCD-Display erscheint zunächst:eine Anzeige z.B. so:|——————————-|| Solar => Akku => Last || || 13,1 || || [12V] [SLD] ||——————————|Das bedeutet: Akku als 12V-Typ und “versiegelt” erkannt, seine Leerlauspannung beträgt 13,1 V. Wie gesagt, meist ist man damit schon fertig. Komplizierter wird es, falls der Akku nicht richtig erkannt wurde, oder man vorher eine andere (gespeicherte) Konfiguration eingegeben hatte. Dann muß man in die Details der speziellen Programmierung gehen.Das Bedienkozept: Statusfelder:——————————-Hauptmenue: Vier vertikale Leuchtdioden sie können jeweils konstant leuchten (= normale Funktion) oder erloschen sein (Funktion beendet) oder in unterschiedlicher Folge blinken (langsames blinken, Einzelblitze, schnelles Blinken).1. Solar-Panel2. Akku3. Last (Symbol Glühbirne)4. Error (Alarm)Darunter ist das Navigator-Feld mit vier Tasten: “^” “” : “v”Für die Grundfunktionen reichen die Auf-Taste “^” und die Ab-Taste “v”.Mit ihnen kann man sich durch alle Messwerte durchtasten, das sind:o Solar-Zelle-Spannung in [V] (unterschiedlich im Leerlauf und unter Last)^ Lade-Strom von Solar in den Akku in [A] (stimmt nicht, angezeigt wird der gesamte Speise-Strom aus der Solarzelle)^ Kapazität des Akkus in % (ist nur richtig ohne Anschluß einer Last!)^ Spannung des Akkus (je nach Last) in [V]^ Strom in die Last hinein in [A]^ Ladekapazität in den Akku in [Ah]^ an den Verbraucher abgegebene Kapazität in [Ah]^ Temperatur in [°C] (im Gerät oder mit Sensor am Akku)^ Verbraucher-Kennziffer (z.B. “15” = Die Last manuell ein- oder ausschalten). Ihr Wert ist von hier aus umprogrammierbar.^ E0 = kein Error (insgesamt 9 Error-Meldungen E0 – E10)^ wieder zurück zum Anfangv bzw. jeweils Schrittweise zurückWillkommene Ausnahme ist die Taste “>”: In dieser Grundfunktion kann man jederzeit mit der “>”-Taste (kurz gedrückt) auch die Klemmen für die Last (also den Verbraucher) Zu- und Ab-schalten.Falls Gründe bestehen, Dinge anders einzustellen, wird die Sache komplizierter. Es geht dabei um die Akku-Parameter und die Last-Einstellungen. Für deren Programmierung müssen alle vier Tasten des Navigatorfeldes benutzt werden. Gestartet wird die individuelle Programmierung stets mit langem Drücken auf Enter (>). Der Progammiermodus wird dann mit einem Zahnrad unten links gekennzeichnet.———-> Enter lange drücken (Zahnrad erscheint unten) mit ^ und v kann man dann die Parameter ändern^ weiter aufwärts + Parameterv weiter abwärts – Parameter> Enter (mittel-lang) (bestätigen)” weitere Akkutypen:- mit “^ und v” Akkutype (USE, FLD, GEL, SLD, Li) auszuwählbar.USD = User defined Definition (frei wählbare Parameter)FLD = Nass-AkkuGEL = Gel-Elkrolyt *)SLD = SeaLD Versiegelter Akku, auch AGM *)Li = Lithium-Eisen-Phosphat-Akku*)der Unterschied von GEL zu SLD besteht darin, dass bei GEL keine “Equilisation” stattfindet und dass die “Boost-Spannung” nur 14,2 V statt 14,4 V bei SLD beträgt.Lade-Ablauf (Ströme von den zu programmierenden Parametern abhängig)————1. Bulk-Charge: Ladung erfolgt mit max. MPPT Ladeleistung aus dem Solar-Panel, bis die für den Akkutyp typische Sollspannung erreicht ist.2. Boost (Constant Charging): Nach erreichen der Sollspannung, wird diese konstant gehalten, der Strom nimmt dabei kontinuierlich ab (Dauer bis zu 2h). Danach wird der Ladebetrieb auf Float Charge runtergefahren.3. Float Charge (Ladungs-Aufrechterhaltung): Die Akku-Spannung wird weiter kontrolliert. Sobald sie unter einen “Float-Set Wert” absinkt, setzt ein erneuter Ladevorgang ein, beginnend mit Bulk-Charge (Zeit dafür programmierbar) und anschließend Boost Charge.4. Boost Charge: Ladung mit voreingestellter Konstant-Spannung. Voreingestellt sind 2 Sunden (können aber auch beliebig vorgewählt werden)5. Equilisation: Monatliche Überladung von je zwei Stunden um flüssigen Elektrolyt durchzumischen. Ist das für AGM-Akkus nützlich?Die für jeden Akkutyp verwendeten automatisch vorgegebenen Parameter sind in der Gebrauchsanleitung übersichtlich gelistet.Den Ausgang für die Last programmieren:—————————————Die Last-Klemmen (Anschluss für Verbraucher ganz rechts) sollen Verbraucher mit bis zu 20A speisen können.In der Grund-Starteinstellung ist die “Verbraucher-Kennziffer” vernünftigerweise als “15” vorgewählt. Die “15” besagt, dass man mit kurzem Druck auf die Enter-Taste “>” den Verbraucher ein- oder ausschalten kann. Sinnvoll kann auch “17” sein, dann ist die Lastbuchse permanent zugeschaltet. Mit den weiteren Parametern kann ich weniger anfangen, aber so geht es:Man navigiert dazu bis zur “Verbraucher-Kennziffer” (voreingestellt ist 15)- Mit Drücken und zugleich Halten der Enter-Taste (>) erscheint unten links das Zahnrad für den Programmiermodus.- Mit “^” und “v” können nun folgende Modi gewählt werden:”0″: = Automatik on/off: Die Last wir nur bei Dunkelheit (= kein Solarstrom) eingeschaltet (Notlicht)”1-14″: = Zeitschalter: Ab stromlosem Panel (Dunkelheit) wird die Last für 1-14 Stunden auf “Ein” geschaltet. Geht aber wieder auf “Aus” sobald das Panel wieder liefern kann.”15″: = Manuell: Man kann mit der Enter-Taste (>) jederzeit die Last zu- oder abschalten.”16″: = Test: Sobald Solarspannung da ist, wird die Last abgeschaltet, ohne Solarspannung wird die Last zugeschaltet.”17″: = 24 Std: Die Lastbuchsen sind dauerhaft eingeschaltet.Ladestrom-Grenze nicht programmierbar:————————————–Ein MPPT Laderegler geht (irgendwie zu recht) davon aus, dass der angeschlossene Akku die vom Solarpanel max. erntbaren Ladeströme auch verträgt. Das ist einerseits effizient, andererseits auch mit Risiken verbunden. Bei starker Sonnen-Einstrahlung können zu kleine Akkus möglicherweise Schaden nehmen. Die sollte man gegebenfalls parallel anschließen.Remote Monitoring-Funktionen:—————————–Das Gerät hat OnBord eine RS-232 Shnittstelle und erweiterte Modelle haben auch eine Bluetooth-Schniittstelle, um die Energiedaten kontinuierlich aufzuzeichnen. Habe ich nicht ausprobiert.Fazit:——-Gute Technik, mangelhaft beschrieben. Daher nur 4 von 5 Sternen.
Larry –
The instructions for attaching the cables aren’t clearThe instructions for attaching the cables to the “Renogy Rover MPPT Solar Charge Controller” aren’t described verbally or aren’t clear in the box.“FIRST lower each terminal hatch by screwing the terminals counterclockwise” see the “User Guide (PDF)” which is below the “Product guides and documents” at the “Renogy 100 Watts 12 Volts Monocrystalline Solar Starter Kit”. The “User Guide (PDF)” doesn’t come with the “Renogy Rover MPPT Solar Charge Controller”.I think the “Renogy Rover MPPT Solar Charge Controller” is better than the “Renogy wanderer”. Look at the “User Manual (PDF)” for the “Renogy Rover MPPT Solar Charge Controller” to compare it with the “Renogy wanderer”.The “Renogy Rover MPPT Solar Charge Controller” probably isn’t designed to charge a “Pinty Portable Uninterrupted Power Supply 500W”.The “Renogy Rover MPPT Solar Charge Controller” works alright with a “CHINS 12V 100Ah LiFePO4 Battery” when the battery type is set to USE and when the charging voltages are set to 14.6. Four 100 Watt Solar panels should be used with a “CHINS 12V 100Ah LiFePO4 Battery” is what I was told.I had to temporarily connect a 12 V A23 battery to the battery side of the Renogy wanderer and Rover before they would start charging the Pinty (the Pinty has 0 V at its solar charging port). I added a zener diode (in series) to the A23 battery to prevent reverse current (when the solar panel was connected to the wanderer).The “Renogy 100 Watts 12 Volts Monocrystalline Solar panel” produced about 73 watts according to the “Renogy Rover MPPT Solar Charge Controller”. The solar uv index was about 6.2 when the 73 watts was measured. Attached is a screenshot of “DC Home” APP paired with a “BT-1” and a “Renogy Rover 30 Amp MPPT Solar Charge Controller”. Maybe a “Renogy Rover 20 Amp MPPT Solar Charge Controller” would be enough for four Renogy 100 Watt Solar panels.
Bill C –
5 STARSWhen it comes to solar, don’t cheap out. I had a few controllers and cords before this one. You need a MPPT controller to overcome shady and overcast conditions. Renogy is probably the best. I camp in an RV. My set up is portable. 3 120w panels in parallel, an 8ga 50′ cord and this Renogy controller. I wasted money going cheap, but now I finally have system that actually work great.
Laidback Jack –
Amazing device, tech support limitedOkay, so you really git a mixed bag with Renogy. Their tech is good, I have one of the 380W panels, it works well, and this Renogy controller. The panel smoked a smaller 20A controller, so I had to get this one.Anyway, I was curious about some issues with the previous Renogy controller failure, etc, but.. calling Renogy, I swear I’m dealing with a crew of highschoolers… these people were terrible, really. just chuckling at my questions, sighing, whining, a couple of ‘whatever, I don’t know…’ kind of reactions.. really.The online tech support is good, the documentation is good, so i gave it 3 starts. don’t bother calling the number, I think it’s the owner’s kids whose chores include company tech support!
Wii oldtyme player –
30 Amp Rover by Renogy Mppt controllerFantastic product! I was using a PWM controller which I thought was good enough, boy was I wrong… Once I installed this to my 300 watt system the battery voltage boosted up big time and the max amps awesome. I run a 12 volt compressor fridge 24/7 and I use medical equip. and since installing the MPPT controller my batteries top off so much quicker after a night of use. I bring them down to just under 50% and they are ready to go for the next night without any issues. I really can not believe the difference MPPT makes. I now get a full 14.4 volts delivered to the batteries instead of 13.8 and they go into float stage much quicker at 13.8 volts
RyanV –
Renogy’s tech is not legit tech.Read the 1star reviews, I bought this unit thinking I was getting top dollar quality, unfortunately the wire connection ports are some of the worst whether you are new to charge controllers or have previous experience these ports will strip with no warning making them unusable and impossible for repair. Secondly, this unit is on a preset by default to charge Flooded batteries. Customer service will not tell you any of this. Every unit is customizable with a password 135790123 to operate as admin, you will then go into settings and change to your preferred battery type and hit the set button followed shortly after pressing the read button to tell the controller to operate under those new settings. The manual does not provide these instructions.
Sean E. Kelleher –
Can’t use with HF radios; bad RFI on 40 metersVery bad RFI on 7 MHz; not good for amateur ham radio.I have a 200W solar setup for my radio shack. When I unboxed the Rover 20 Amp MPPT I was impressed; it’s big and heavy and build quality seems very good. It has easy to understand / navigate information display and shows me everything I want.Unfortunately, it generates a very loud spike on 7 Mhz, repeating every 40 KHz, making this charger unusable for ham radio. Unless I can find a way to choke / filter, I’ll have to return it and try another brand.
R. Leon –
Controller for a 200W Solar System. AWESOME!Installed this with a two 100W solar panels (200W total). This thing is amazing! I was off grid on a camping trip in the sierras for a week. This charge controller kept my batteries fully charged at all times. In the morning my batteries dipped to 78% charge but were at full capacity before noon every day. Additionally, I connected a wall charger to the 12V load output. With that I was able to keep all of my phones, Kindles, and other 12V devices fully charged. Now get this… Every night I plugged my phone into the wall charger that ran on solar only and my phone would be at 100% charge every morning by charging off of moonlight alone!Instead of fuses, I installed circuit breakers before and after the system. This allowed me to turn off electricity before or after the system and prevent that exciting zap that one gets when the play with live DC voltage.Spend the extra money and get the MPPT controller, you will be glad you did. I know I am!